Guide
Build one with
your own model
This page is a scroll-driven 3D showcase: one model, a camera path with a stop on every detail worth naming, and copy that fades in beside it. The model is swappable and the camera path is edited in the browser, so the same site carries a product, a character or a self portrait. Part one makes the model. Part two makes the site.
Part one
Make the model
Nine steps from one photo to a .glb small enough to ship — with the two prompts I actually used and the real reference set behind the model on this page, mistakes included. Every tool here is somebody else's; swap any of them for one you prefer.
01Start from one photo, and take the glasses off
Nothing downstream ever sees your face — it sees whatever the reference images agree on. So the source photo has to carry nothing the solver would need to invent its way around. Glasses are the common case and the worst one: a lens is a transparent surface with reflections, the frame casts a shadow across the temples, and an image-to-3D pass reads all of it as geometry welded to the head. Removing them costs one sentence to any image model — mine was four words of Indonesian — and the eyes, brows and nose bridge come back reconstructed. Hats, masks, headphones and earrings go the same way.
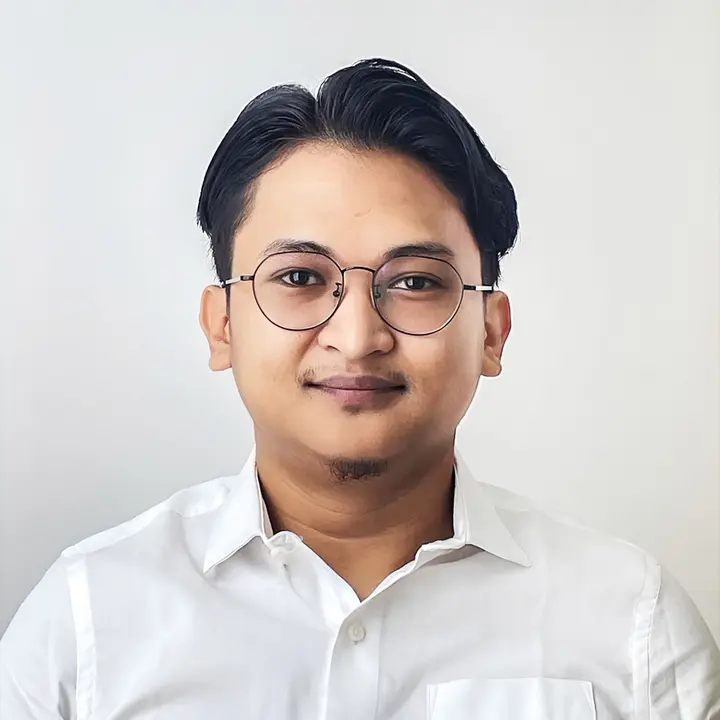
Don’t — frames, reflections, shadow on the temples 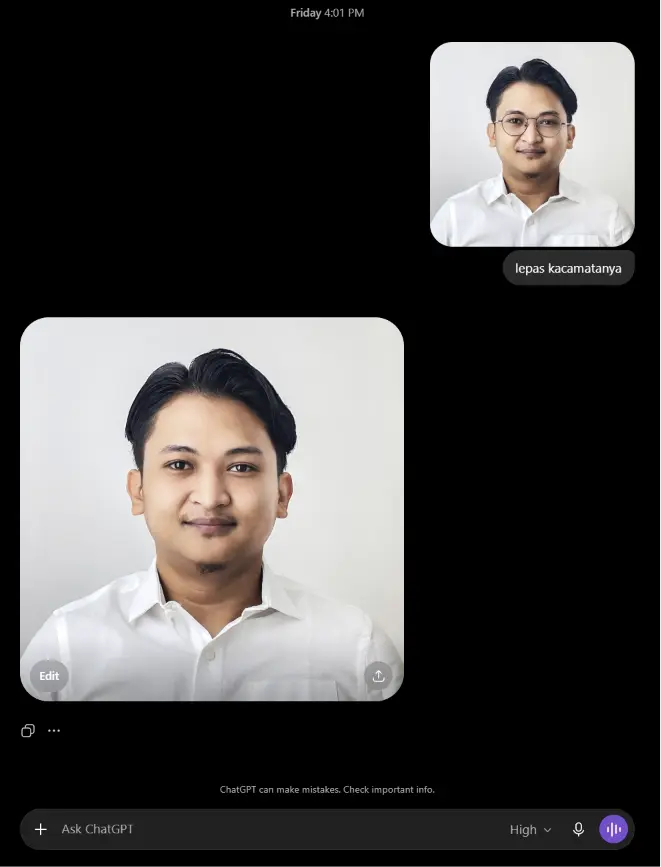
Do — one line: “lepas kacamatanya”, take the glasses off 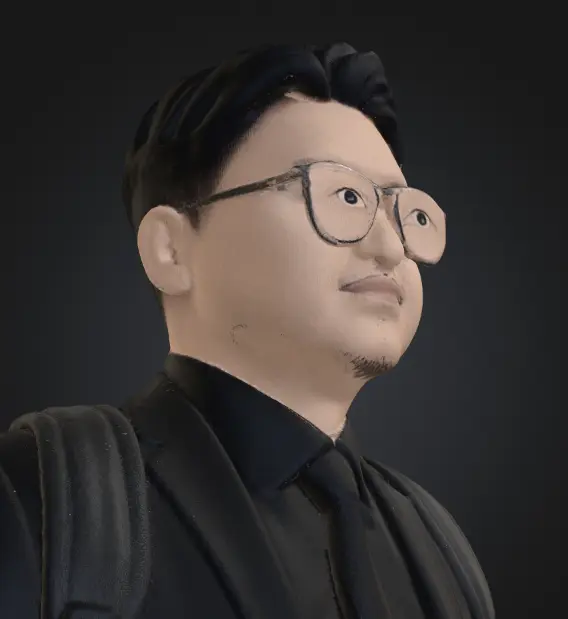
Why — skip it and the frames come back as skull 02Ask for the head turnaround — four files, not a sheet
Front, left profile, back, right profile, of the same head at the same age with the same hair. Identical camera height, identical scale, identical crop, one neutral expression with the mouth closed, flat even light and a plain background. A long lens or an orthographic camera, because perspective distortion is a shape change the solver believes. Insist on four separate files: a contact sheet has to be cut back apart, and every crop you make by hand puts back the misalignment the prompt spent a page removing. The full prompt is below — paste it verbatim and attach the photo from step 01.
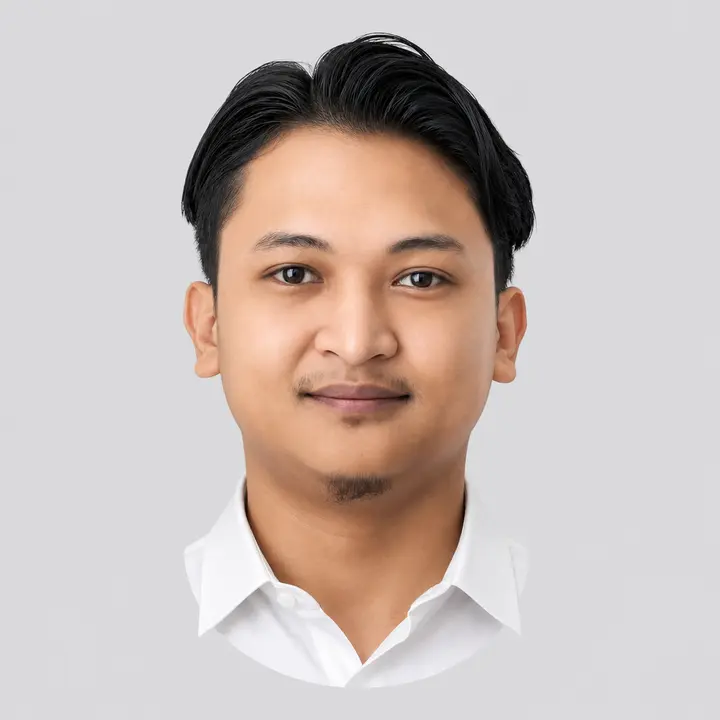
File 1 of 4 — front, its own 2048² image - prompt-head-turnaround.txtthe exact prompt, copy it whole
03Then the body, in an A-pose
Same four angles, same rules, one addition that decides whether the result can ever be rigged: arms held 25–35° away from the torso, palms turned in, fingers apart, legs straight, feet about shoulder width. That gap is the whole point — it is what lets an automatic rigger find a shoulder, an elbow and a wrist instead of guessing at a silhouette. Keep the floor line, the camera height and the crop identical across all four, put the camera at pelvis height, and let the body fill 85–90% of the frame.
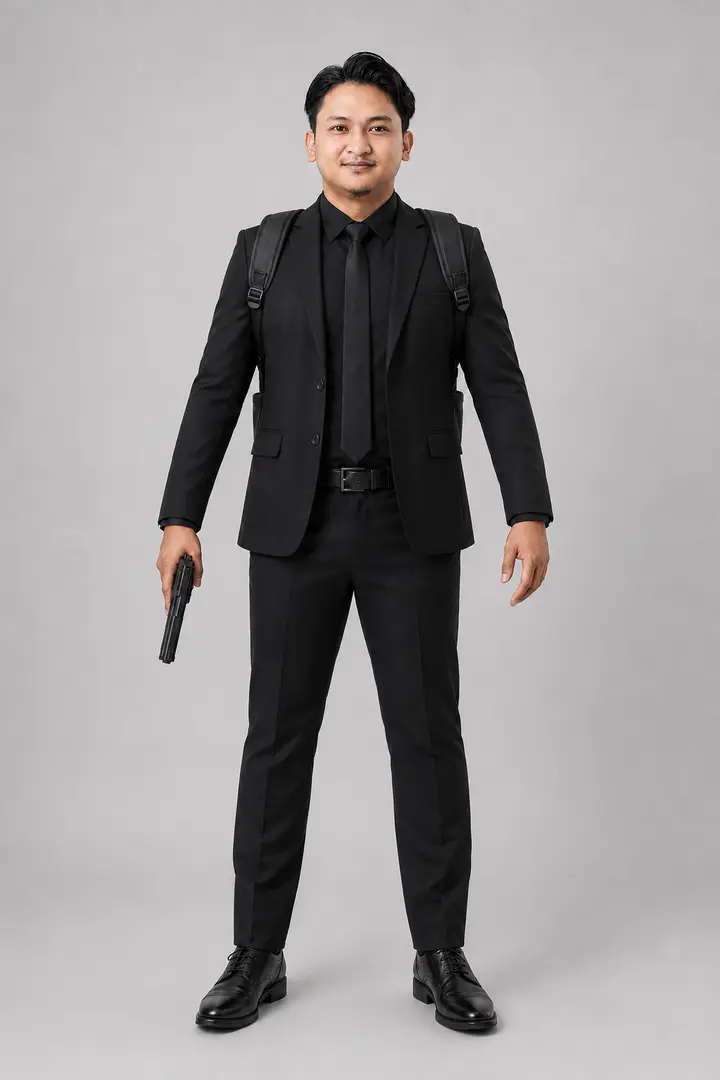
Do — front: arms clear, hands open, prop pointed down 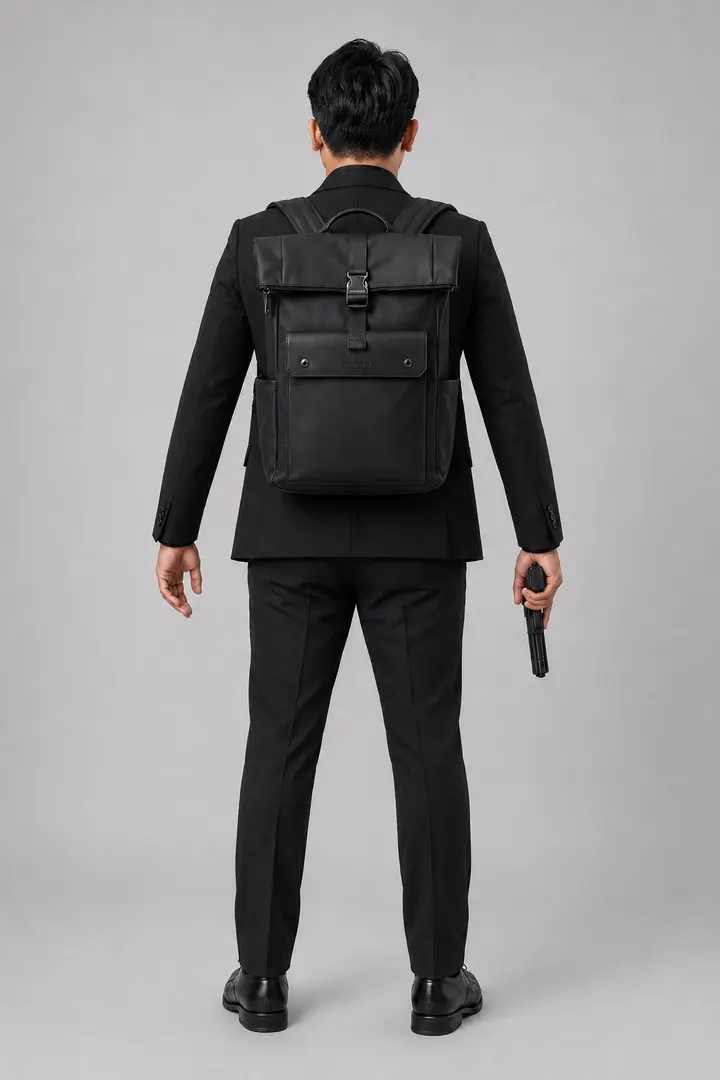
Do — back: same shoulder line, same hand holding it - prompt-body-turnaround.txtA-pose, camera, outfit and backpack rules
04The side views are where a set goes wrong
Ask for a profile and an image model will happily hand you a fashion photograph: arms hanging flush against the body, the prop laid across the thigh, and — because you stopped saying it — the glasses back on. Read the silhouette instead of the picture. If the arm does not separate from the jacket in outline, the mesh will not separate it either, and you will be rebuilding a forearm by hand in Blender. Regenerate until both side views show a gap at the shoulder and the wrist, the bag reads as a box with depth rather than a flat patch, and the two profiles are mirrors of each other rather than two different days.
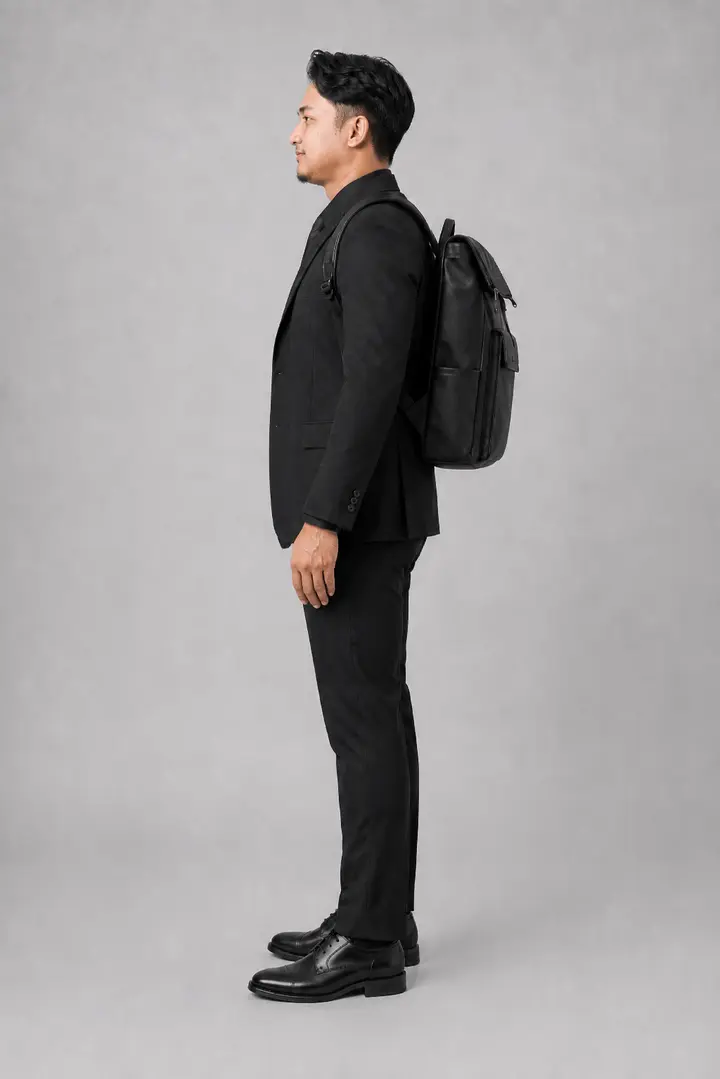
Do — arm reads as its own limb, bag has depth 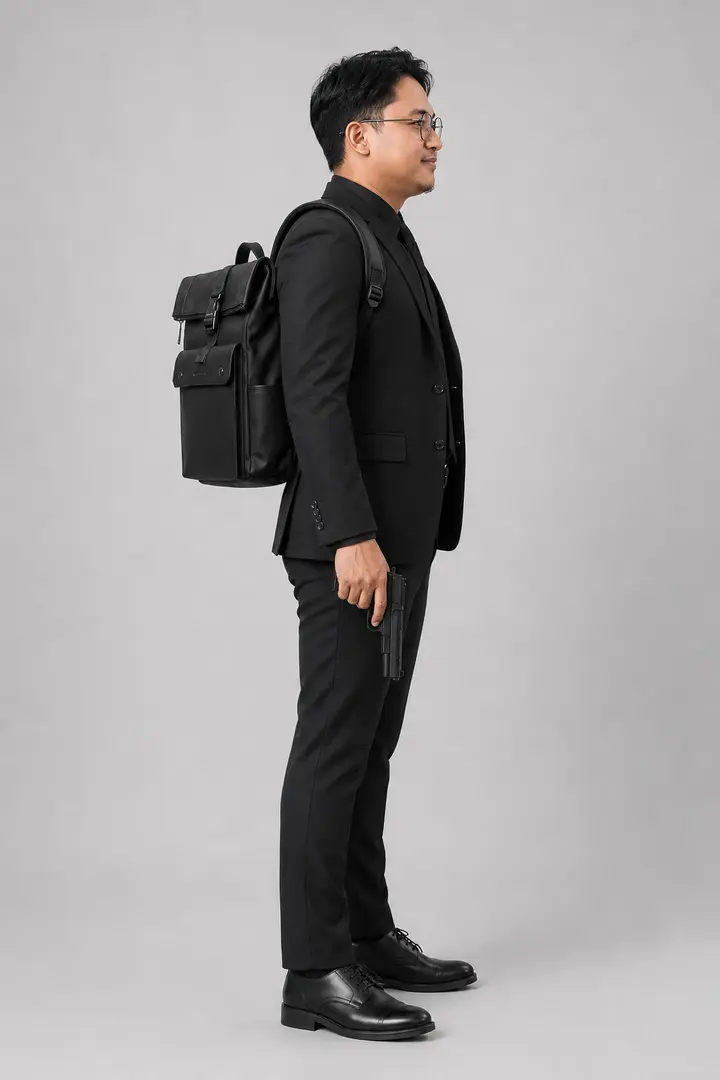
Don’t — arms welded to the torso, glasses back, prop over the leg 05Give props and worn objects their own reference
A bag, a jacket, a weapon, a product: anything you actually care about the look of gets a real photograph fed in beside the turnaround, so the generator copies it instead of inventing a plausible one. Then generate a second clean pass with nothing worn and nothing held — a backpack sits exactly over the spine and shoulder line the rigger reads, and a prop in a hand costs you the fingers. A character is the same job with a different subject: one full-body reference in, four views out, which is where the second model on this site came from.
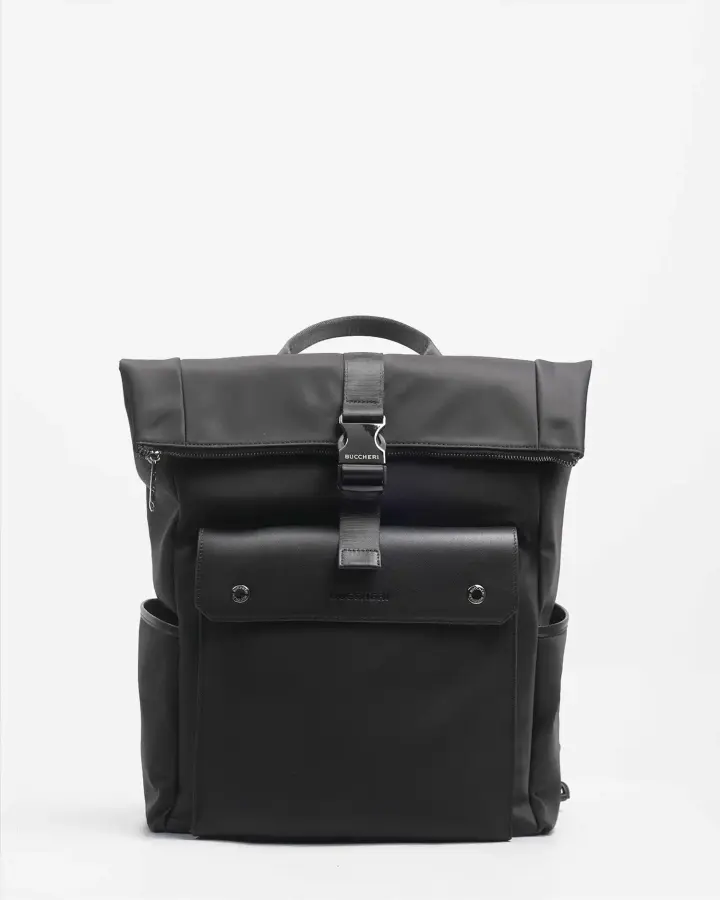
The bag as the shop shot it — flat light, plain background 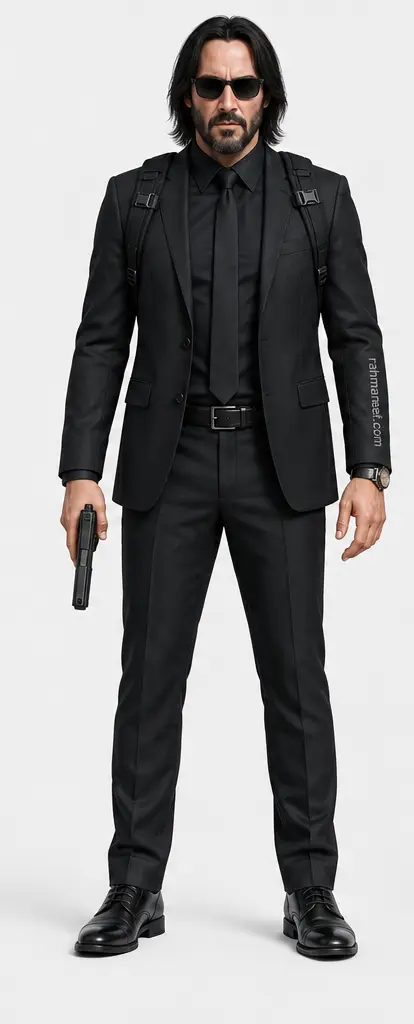
A character reference — one view in, four out 06Turn the references into a mesh
Upload the sheet to an image-to-3D service. I use Meshy: open the workspace, switch the Multiview toggle on, and add your views one at a time rather than dropping the whole set in at once. Generate, inspect the preview from every side, and download the result — GLB by default, or .blend if you already know you will keep editing. Run the head and the body as separate generations, and expect the body pass to lose the face: it spends its resolution on a whole person, so the head comes back as a generic one. That is not a failed run. The head pass is where the likeness lives, the body pass is where the silhouette lives, and step 08 joins them.
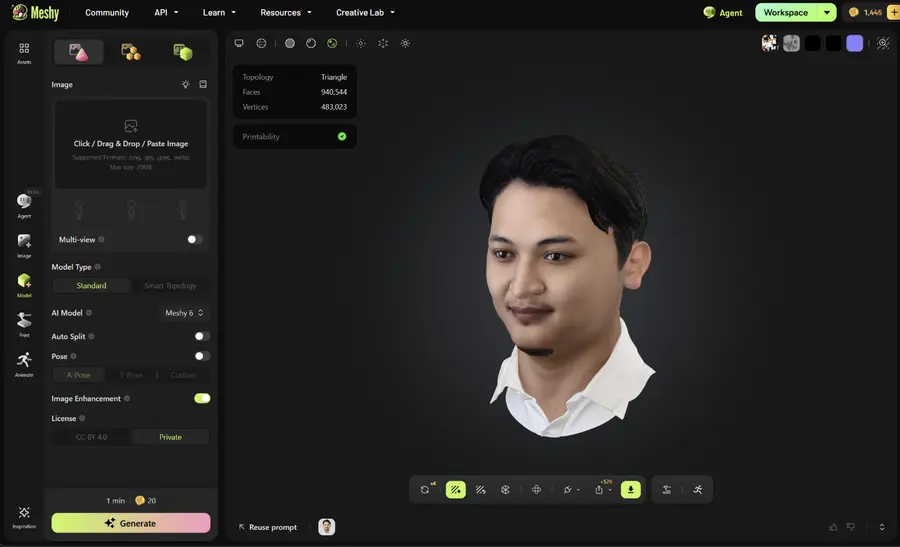
Head pass — the likeness, at 940k faces 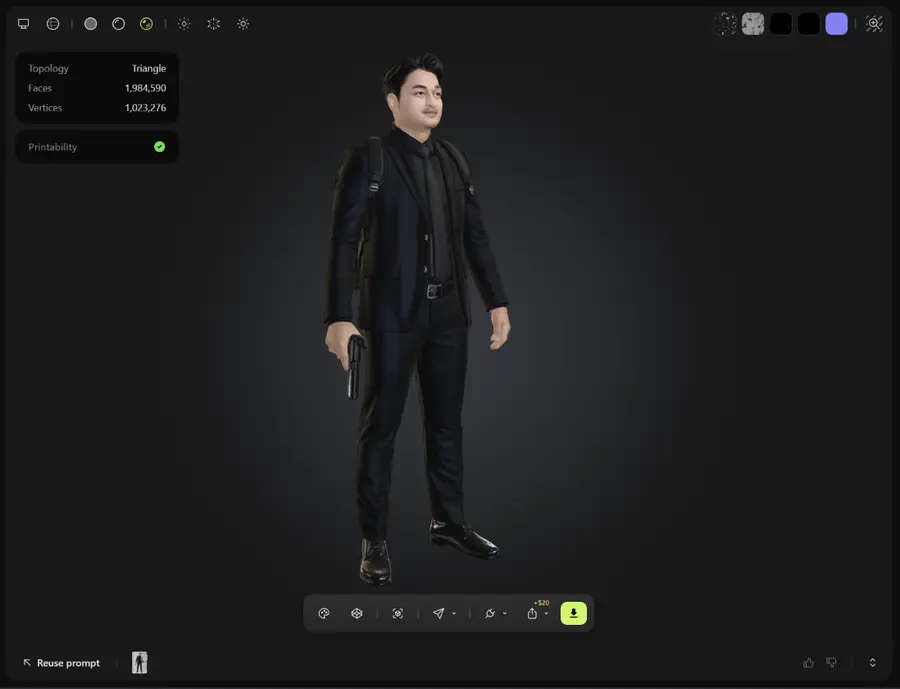
Body pass — 1.98M faces, and a face that is not mine - meshy.aiaffiliate link — costs you nothing, supports this
07Install Blender and the Blender MCP server
Blender is where the separate generations become one model. The MCP server exposes a running Blender session to an assistant, so the assembly can be described instead of clicked. Install Blender 3.0 or newer and the uv package manager, add addon.py from the blender-mcp repository through Edit > Preferences > Add-ons, and enable it. Register the server with your MCP client, then in Blender press N for the sidebar, open the BlenderMCP tab and hit Connect.
{ "mcpServers": { "blender": { "command": "uvx", "args": ["blender-mcp"] } } }08Assemble it with an assistant, one stage at a time
Point your MCP-capable assistant at Blender and work in stages. This is the step that fails if you ask for everything in one message: a long request runs past the tool timeout, and a run that dies halfway leaves the scene in a state neither of you can describe. Give one instruction, confirm it in the viewport, save the file, then give the next. Eight stages is a realistic shape — import, align, join, clean, retopologise or decimate, bake the textures into one atlas, collapse to a single PBR material, export.
You are driving Blender over MCP. Work one stage at a time and stop after each one. Stage 3 of 8 — join HEAD and BODY into a single mesh: merge by distance, delete the interior faces where they overlap, and recalculate normals outward. Do not touch materials yet. Report the triangle count before and after, then save the file and stop.09Export a .glb that is ready to use
Ask for glTF 2.0 binary, +Y up, transforms applied, no cameras, no lights, no animation, and a triangle budget you can defend over a mobile connection — 100k to 200k is comfortable. One material and one texture atlas. Compress it: both meshopt and Draco load here, and the model on this page went from ten megabytes to under two with nothing visible lost. Meshopt is marginally better on this site because its decoder ships inside the bundle, while Draco fetches one the first time a compressed model opens.
Part two
Build the site
Eleven steps from clone to deployed, the last of which is just me asking to see the result.
01Clone it and run it
No environment variables, no backend, no account. What you get is this site: the bundled model, the default camera path, and the copy that lives in app/(public)/_content/copy.ts. Everything below is optional on top of a page that already works.
git clone https://github.com/rahmanef63/scroll-3d-showcase.git cd scroll-3d-showcase bun install bun dev # http://localhost:300002Get the model into the site — two routes
Either put the .glb in public/ and commit it, which needs a rebuild for every model but serves the file as a static asset for free; or press UPLOAD in /studio, which stores it in the backend and needs no repository, no rebuild and no deploy. The second is the only route someone without git has, and the one that matters if you deployed this to Vercel from a clone. Exporter units do not matter either way — the loader rescales whatever you give it to a fixed height and centres it on the origin.
03Add a backend, if you want the editor
Convex holds two tables: the models it has seen, and one preset per model. Both ends compare the same token — the deployment copy guards every write, the local copy unlocks /studio. Skip this step entirely and the public page still renders; only the editor stays shut.
bunx convex dev # creates the deployment bunx convex env set STUDIO_TOKEN <password> # guards the mutations echo 'STUDIO_TOKEN=<password>' >> .env.local04Open /studio, then SYNC or UPLOAD
SYNC scans public/ and registers every model file it finds; UPLOAD takes a .glb straight from your machine into the backend. Ids are assigned once and never reassigned, so a file that leaves and comes back gets its tuning back with it. A scanned file that vanished is flagged rather than deleted — it cannot be published, and it stops being served if it already was. An uploaded one has no file to lose; FORGET deletes the row and its bytes together, and that is the only way it leaves storage.
05Keep uploads small — that is a bandwidth budget
An uploaded model is served by the backend, and every visitor downloads it in full, so its size is a recurring cost rather than a one-off. The limit is 16 MB and the browser refuses anything over it before a byte is sent; the backend then reads the first twelve bytes of what actually arrived, checks they say glTF version 2 and that the header length matches the file, and deletes anything that fails. A renamed .png never becomes a model. Ship a compressed export and this is a non-issue: the model on this page is 3.5 MB, down from 10.8.
06Tune the camera
Drag to orbit, wheel to dolly, W/S/A/D/Q/E to fly, and + on the left rail to capture the current view as a new stop. Each stop is a keyframe at a scroll position: the page scroll is the timeline, SPACE plays it back, and the sliders in the SHOT tab do the fine work. Undo is Z and goes back fifty steps.
07Write the words
The COPY tab holds the title, the boot line, the brand, the meta description and one panel per stop, each with its own fade window. Type into the title and the wordmark updates as you go; saving it renames the browser tab and the search result too. The rich blocks — stat grids, card grids, link lists — are components keyed by section id in app/(public)/_content/panel-extras.tsx.
08SAVE, then GO LIVE
SAVE writes the preset and invalidates the public page. GO LIVE points / at this model. Two acts rather than one, on purpose: dropping a file into public/ must never swap the site hero on its own. A model published before anyone tuned it renders on the default path rather than quietly keeping the old one on screen.
09Keep the tuning portable
EXPORT downloads the whole preset — camera, markers, scene settings and every word — as JSON. IMPORT reads one back into whichever model is open, which is how a tuning session survives swapping the .glb for a better export under a new name. It is also the shortest route through a language model: export the file, ask for a rewritten set of panels or a different camera rhythm, import the answer. Nothing is written until you press SAVE, so a bad suggestion costs one undo. The files under seed/ are exactly these files, and one command writes one straight into a deployment.
bunx convex run seed:preset "$(cat seed/rahman-3d.json)"10Ship it
Two ways out: the Dockerfile builds a standalone server that any Node host runs, and the repo has a Vercel button that clones it and asks for the same two variables. convex/_generated is committed, so neither needs a codegen step. Set the same two variables wherever it lands. With neither set the deploy still serves the bundled model and the default path, so a backend that is down or misconfigured can never take the page with it. Want no backend at all? COPY TS puts the tuned keyframe table on the clipboard in config/keyframes.ts shape — paste it in and the path ships inside the bundle.
11Show it to the world, and mention me
I am genuinely curious what comes out of this — no two of these have looked alike yet, and the model is the least predictable part. If you get stuck anywhere, including inside somebody else’s tool, search rahmanef_ and message me wherever you find me.